Users of BMSOne can find it hard to remove the special Solo battery connector from a dead battery, this is a guide on how to do it, with a focus on simplicity.
No desoldering vacuum station, preheater, or reflow oven required. 🙂
Or: you can just buy it here (somebody else is selling, I am just providing the link for your convenience I am not paid to do so)
Safety First :
People are afraid of the dreaded thermal runaway, where the Lithium-Polymer/ion battery spew gasses & fire when shorted/damaged.
Basic physics tells us that the energy to do that, must be available, or else, there will not be smoke/fire hence:
Drain the battery – method 1:
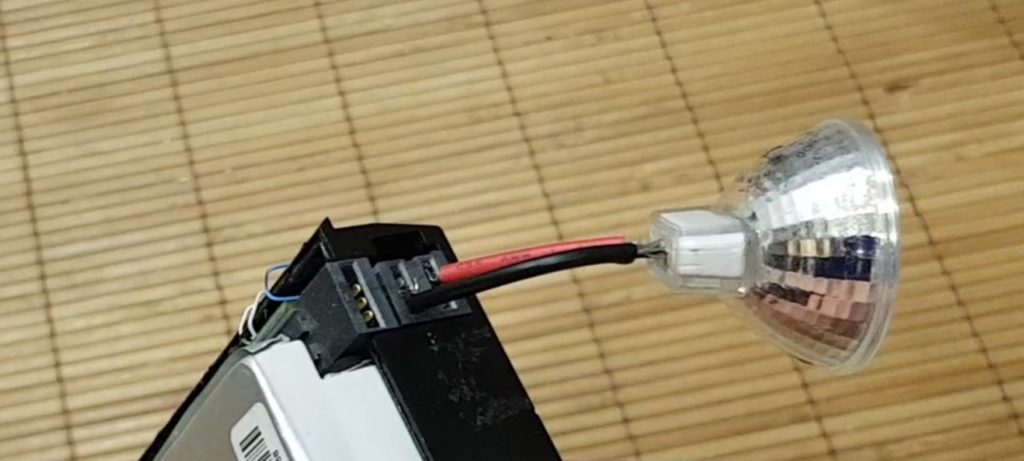
Connecting a small 12v ,5-10W bulb to a bad battery (no reason to open it like I did in the photo below)
DO NOT think a 50W bulb will drain it better, it will make the voltage drop faster(and battery will switch off) – in the end , slower discharge is better.
In this case, I stuck the wires into the +/- connector. Switched on the battery, and let it sit on a concrete floor until it dies.
Drain the battery – method 2:
You may as well hover the Solo till it can’t fly no more, then let it be on until the battery dies completely
The BMS will fail to keep the FET’s on at somewhere around 5.7v or so, When the pack voltage falls that low, it will switch off, .. feel free to let it recover for a while then switch it on again..
When the battery is empty:
Solo Battery tool tells me that this battery is drained, no cell is even near 3.0v even an hour after it switched off
I have seen the voltage drop far enough to it to switch off more than once.
A properly drained battery, where all cells are low, do not have the energy to cause any fireworks, let me prove it to you.:
Opening the battery shell:
(will describe the process later – many have already done it.. if YOU did a video on it, feel free to let me embed it here.)
Extracting the connector:
I used an electronic hotplate, set to 300°C
You can use a cooking plate just fine.
The plate should not be red hot, let the PCB sit there for a few minutes, then start pushing the PCB down (so that the pins get a better thermal connection, and get pushed thru in the end.)